Verifying your credit card
Overview
When you make a payment with your credit card, our Financial Department sometimes needs to verify your payment. To complete this, you'll need to upload photos of yourself, your ID, card, and an insertion order. Let’s explore this in detail.
Guide
To begin the verification process:
Go to your dashboard → Click on the Add funds tab → Click the Verify card button:
After this, let’s go step by step.
Step 1. Selfie with your ID and a note
Take a selfie where all three items are clearly visible in a single photo:
- Your face
- Your ID: passport or driver’s license
- A note with “OnClickA Top Up” written on it.

After uploading the photo, click on Continue.
Step 2. Photo of your ID document
Please upload a clear photo of your passport, ID, or driver's license. Ensure the name on the document matches the name on your card and all text is easily readable.
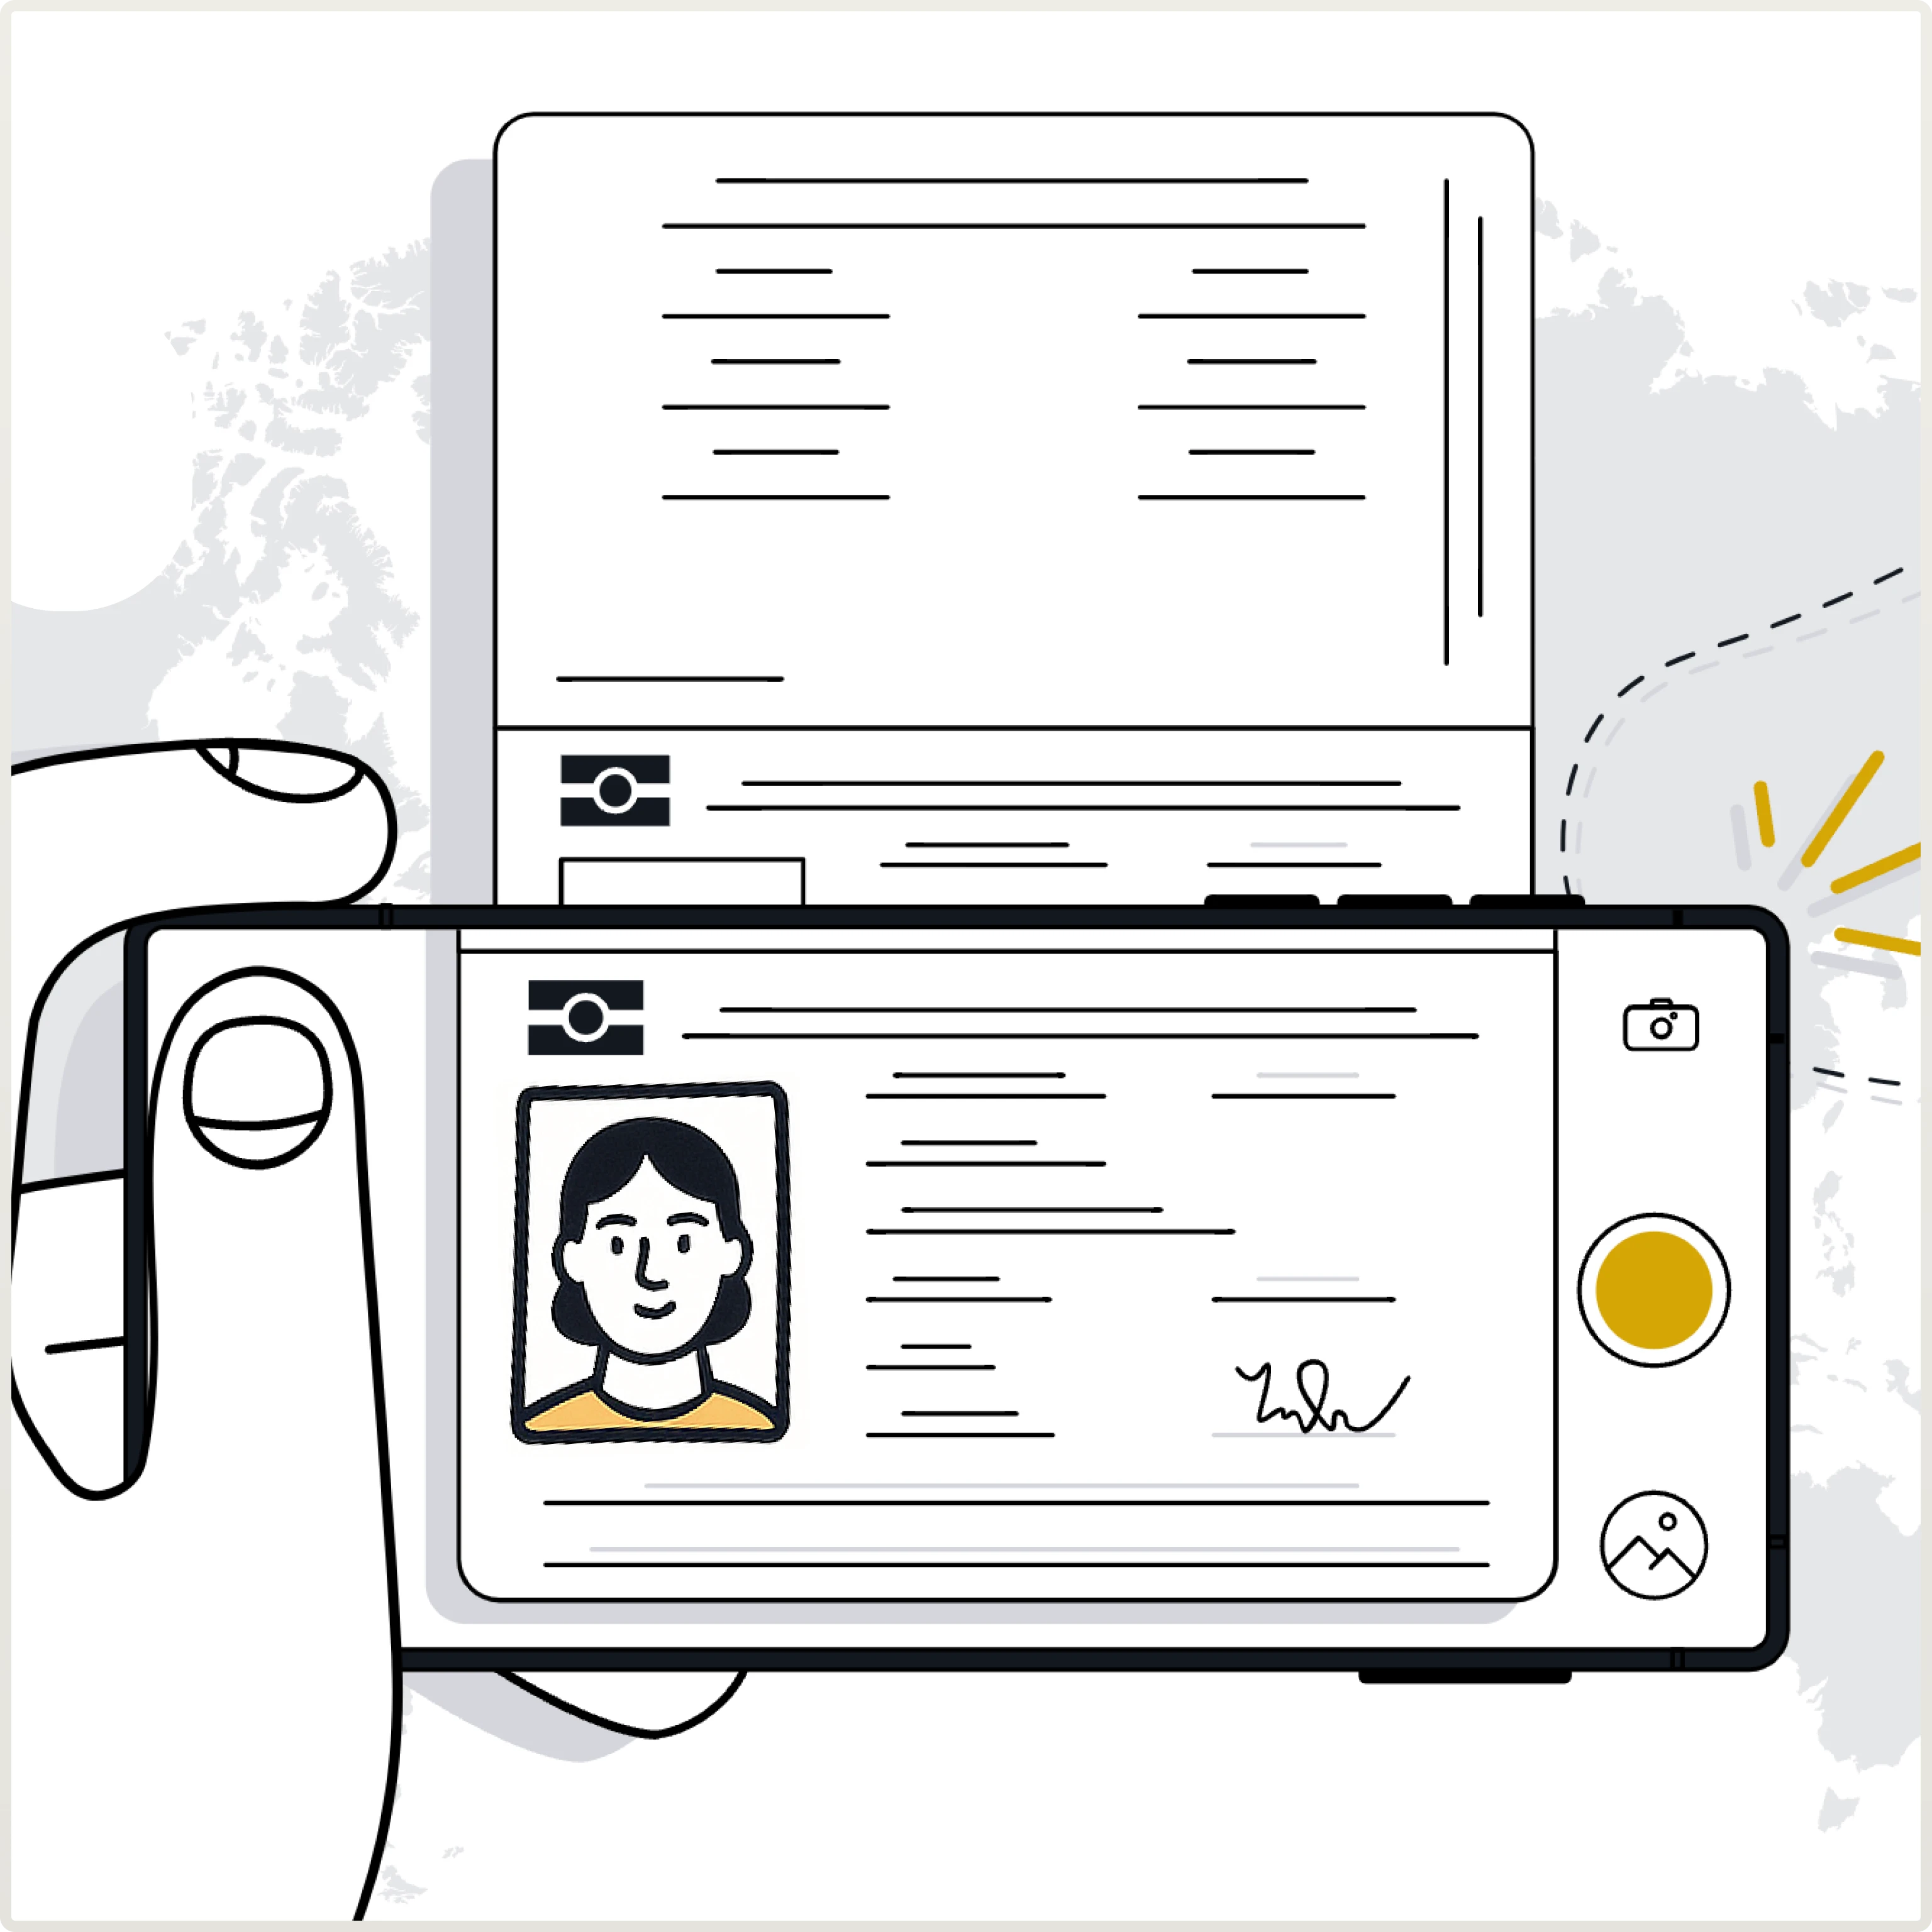
After uploading the photo, click on Continue.
Step 3. Photo of both sides of your card used for payment
The cardholder’s name, expiration date, and the last 4 digits of the card number should be visible.
For your safety, please cover or blur the middle digits (e.g., 0000 xxxx xxxx 0000) and the CVV code on the back.
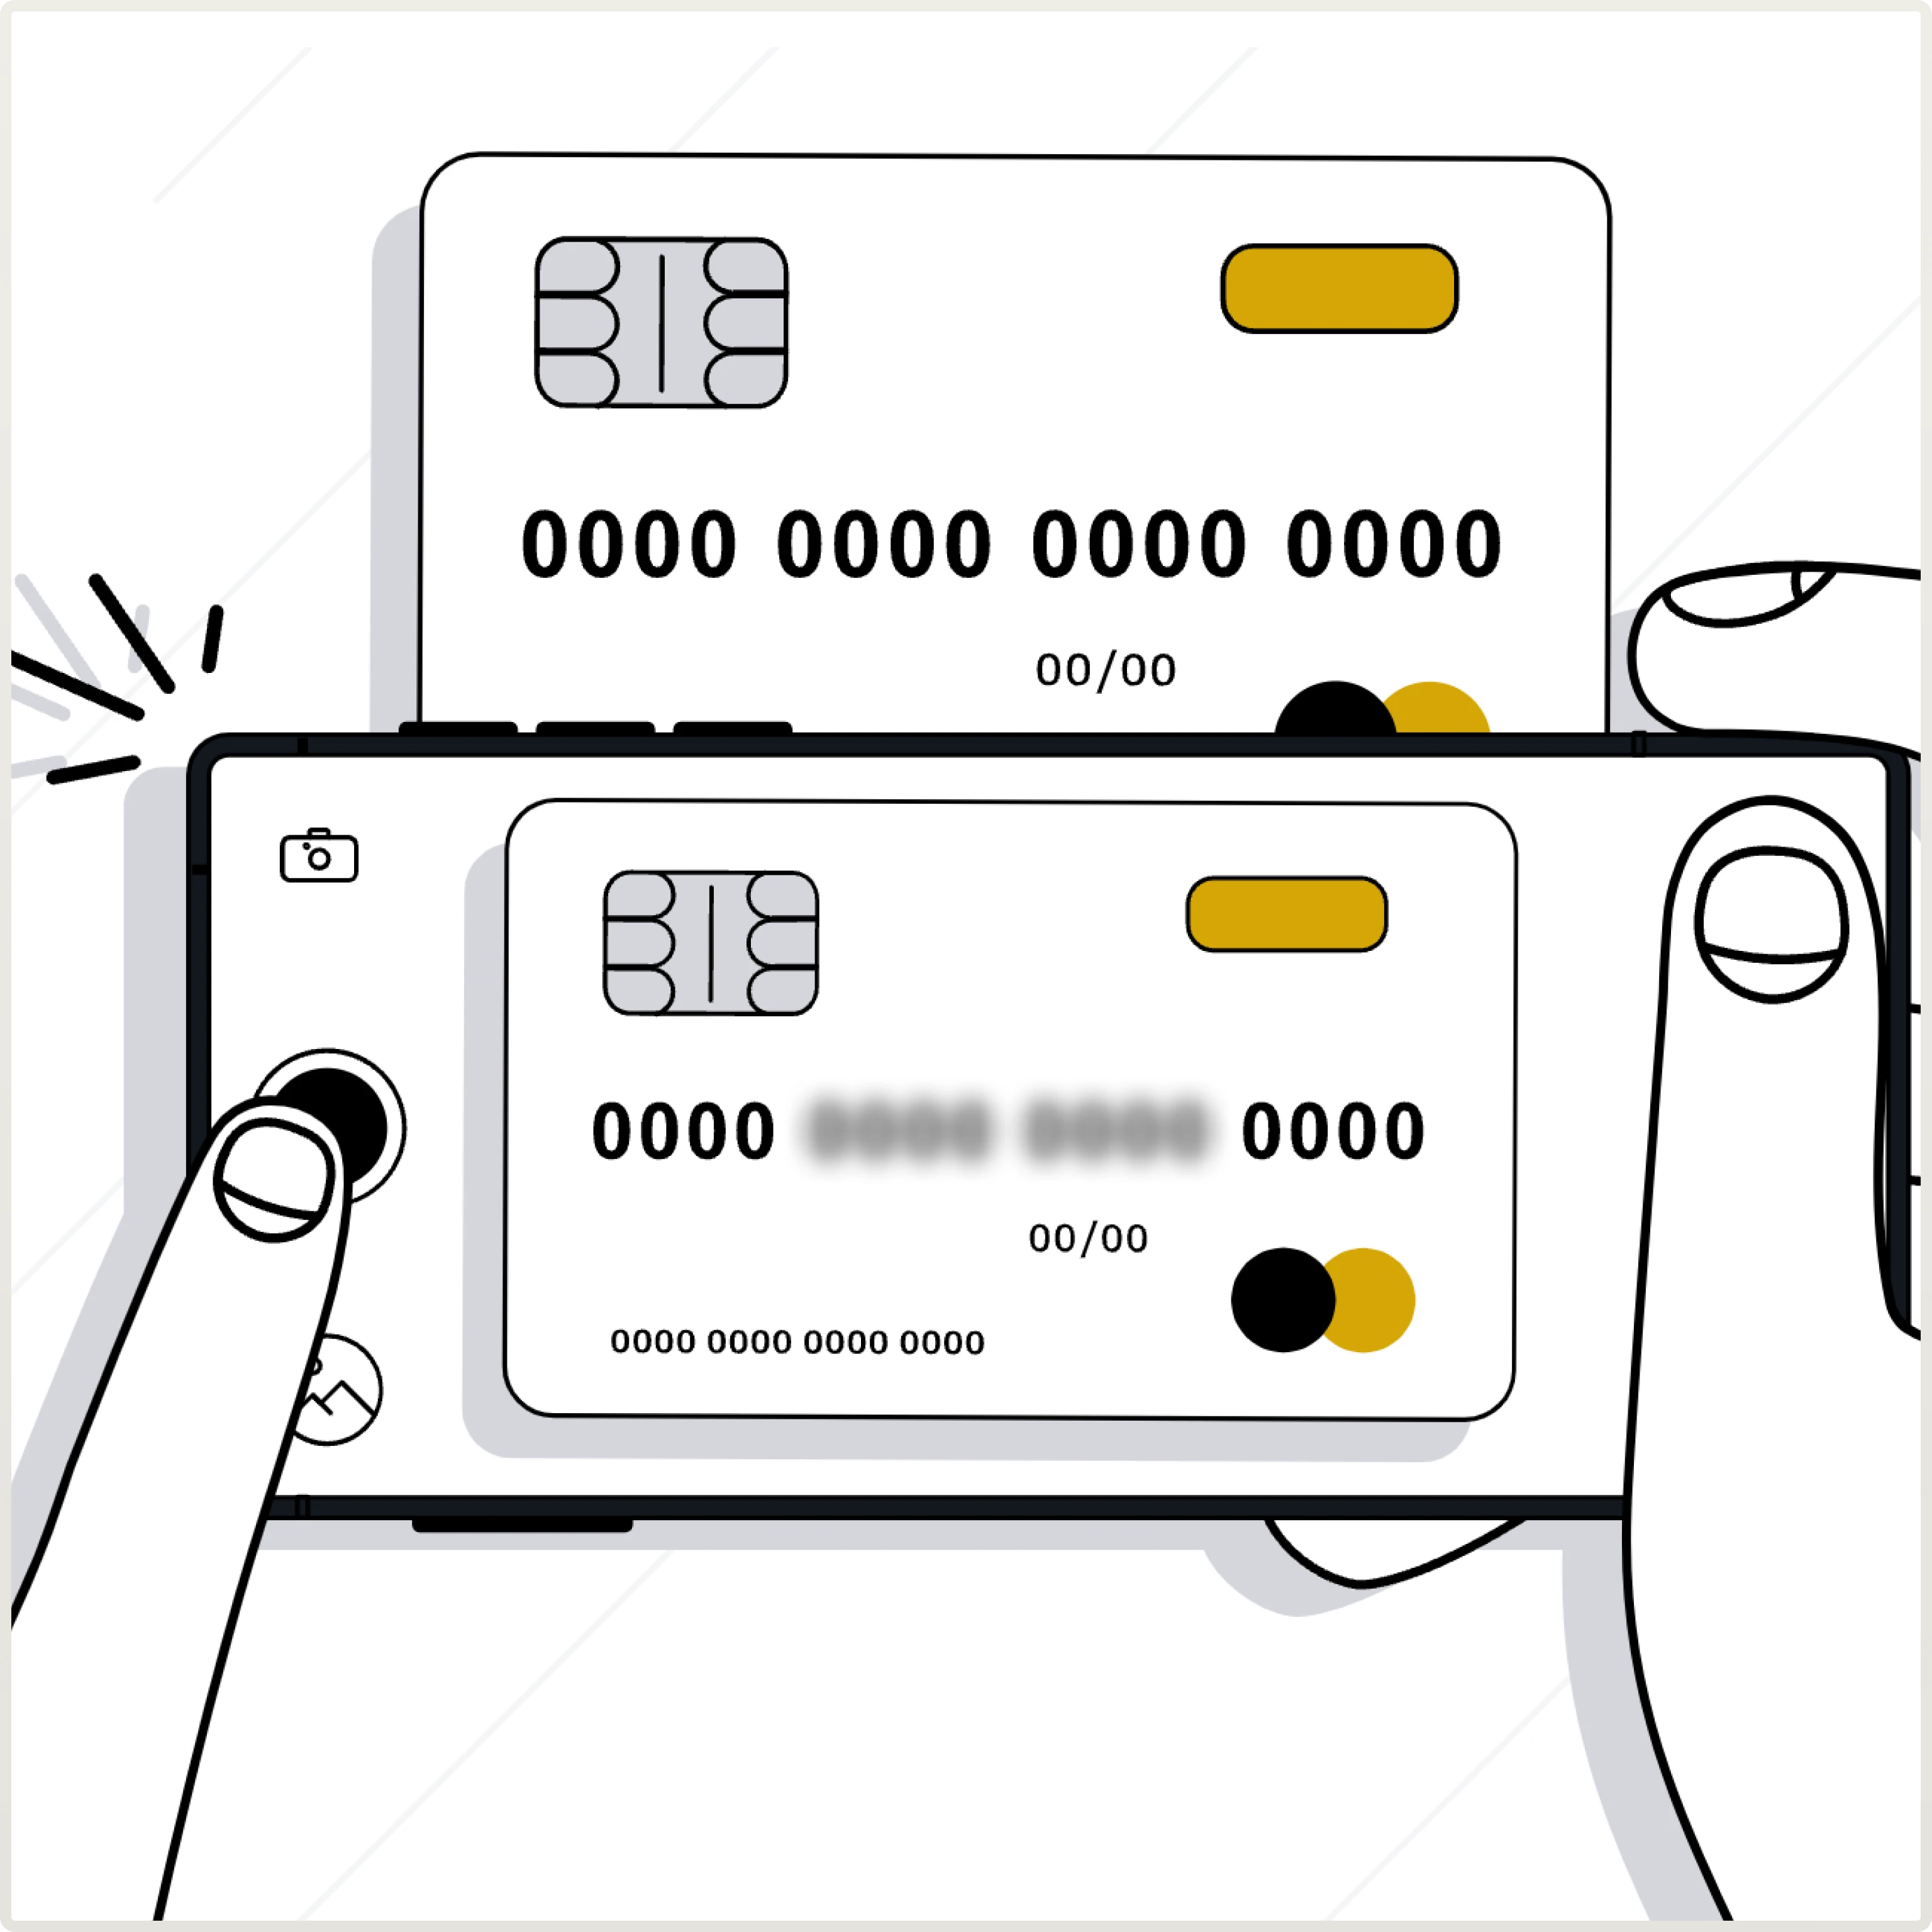
After uploading the photo, click on Continue.
Step 4. IO document
Download the IO document from your OnClickA account in Step 4 of the Verification section:

Complete it, sign it, and upload a photo of the completed form:
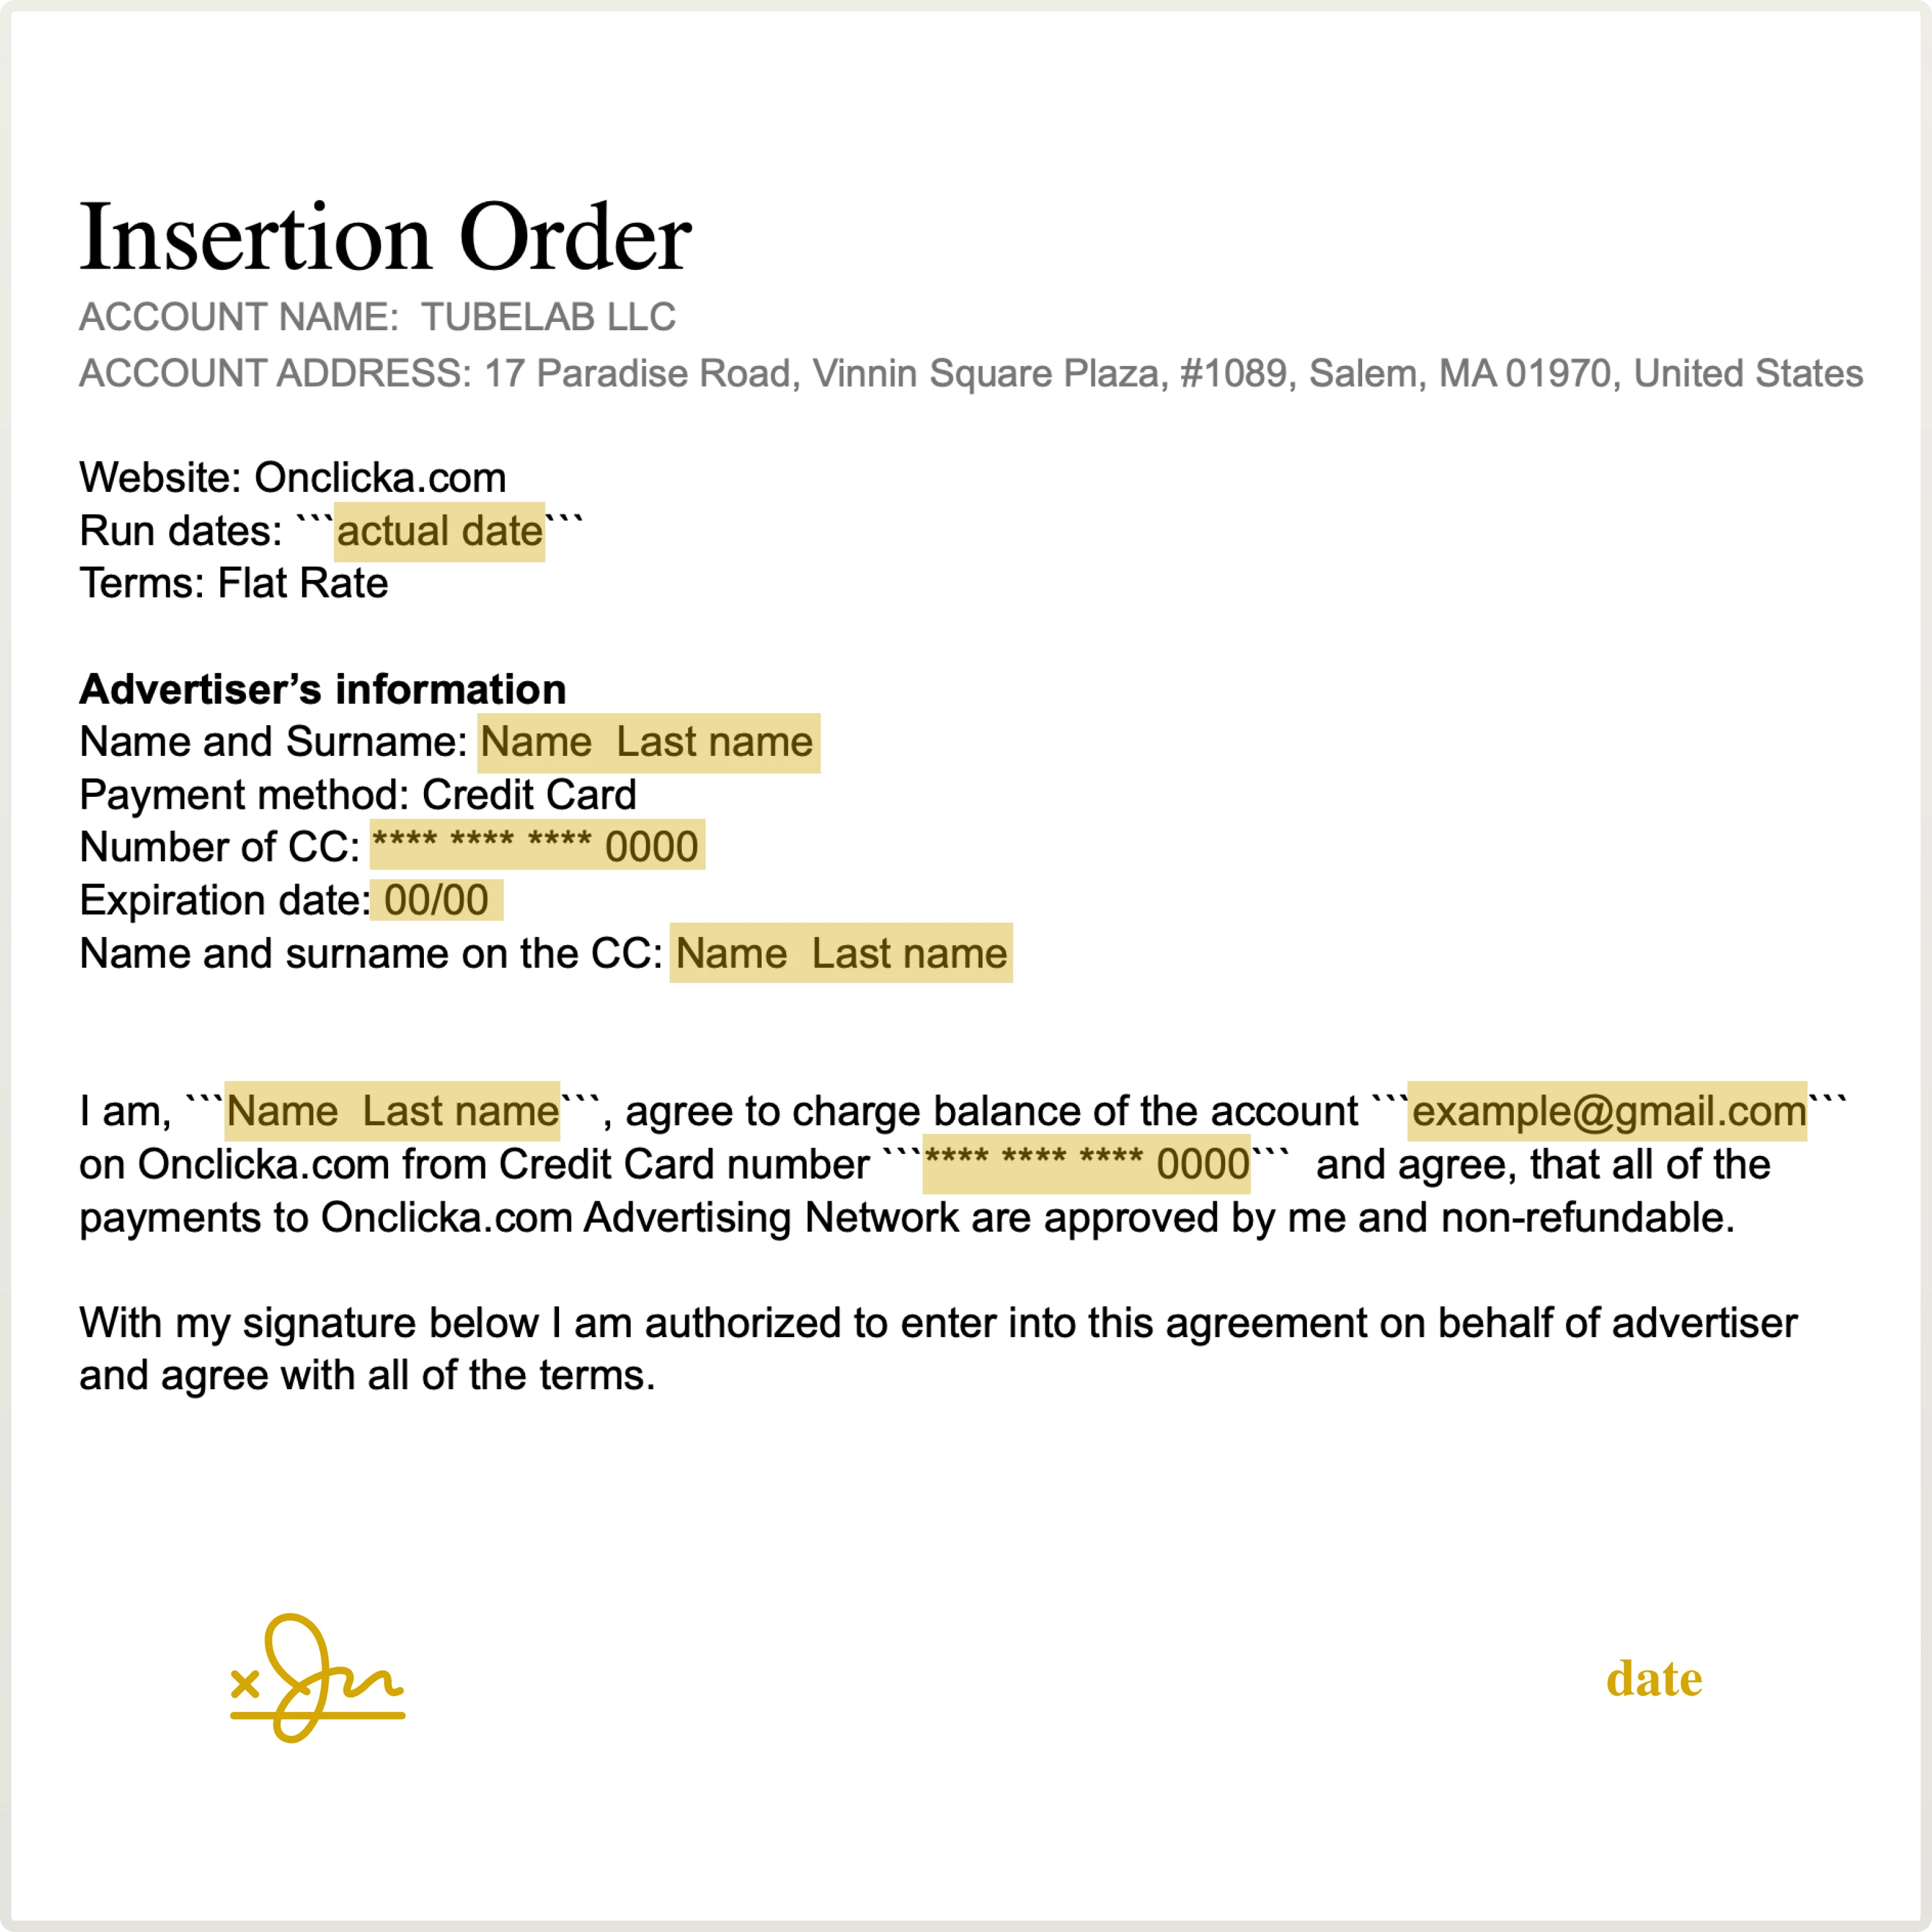
Example of IO—Insertion Order
After uploading the completed form, please click on Send.
What happens next?
After uploading all the documents, you can reach out to your personal manager to speed up the process. If you don't have a personal manager, feel free to contact our Customer Support department. We are available to assist you with any questions or concerns you may have during the verification process.
